Understanding Drywall Damage
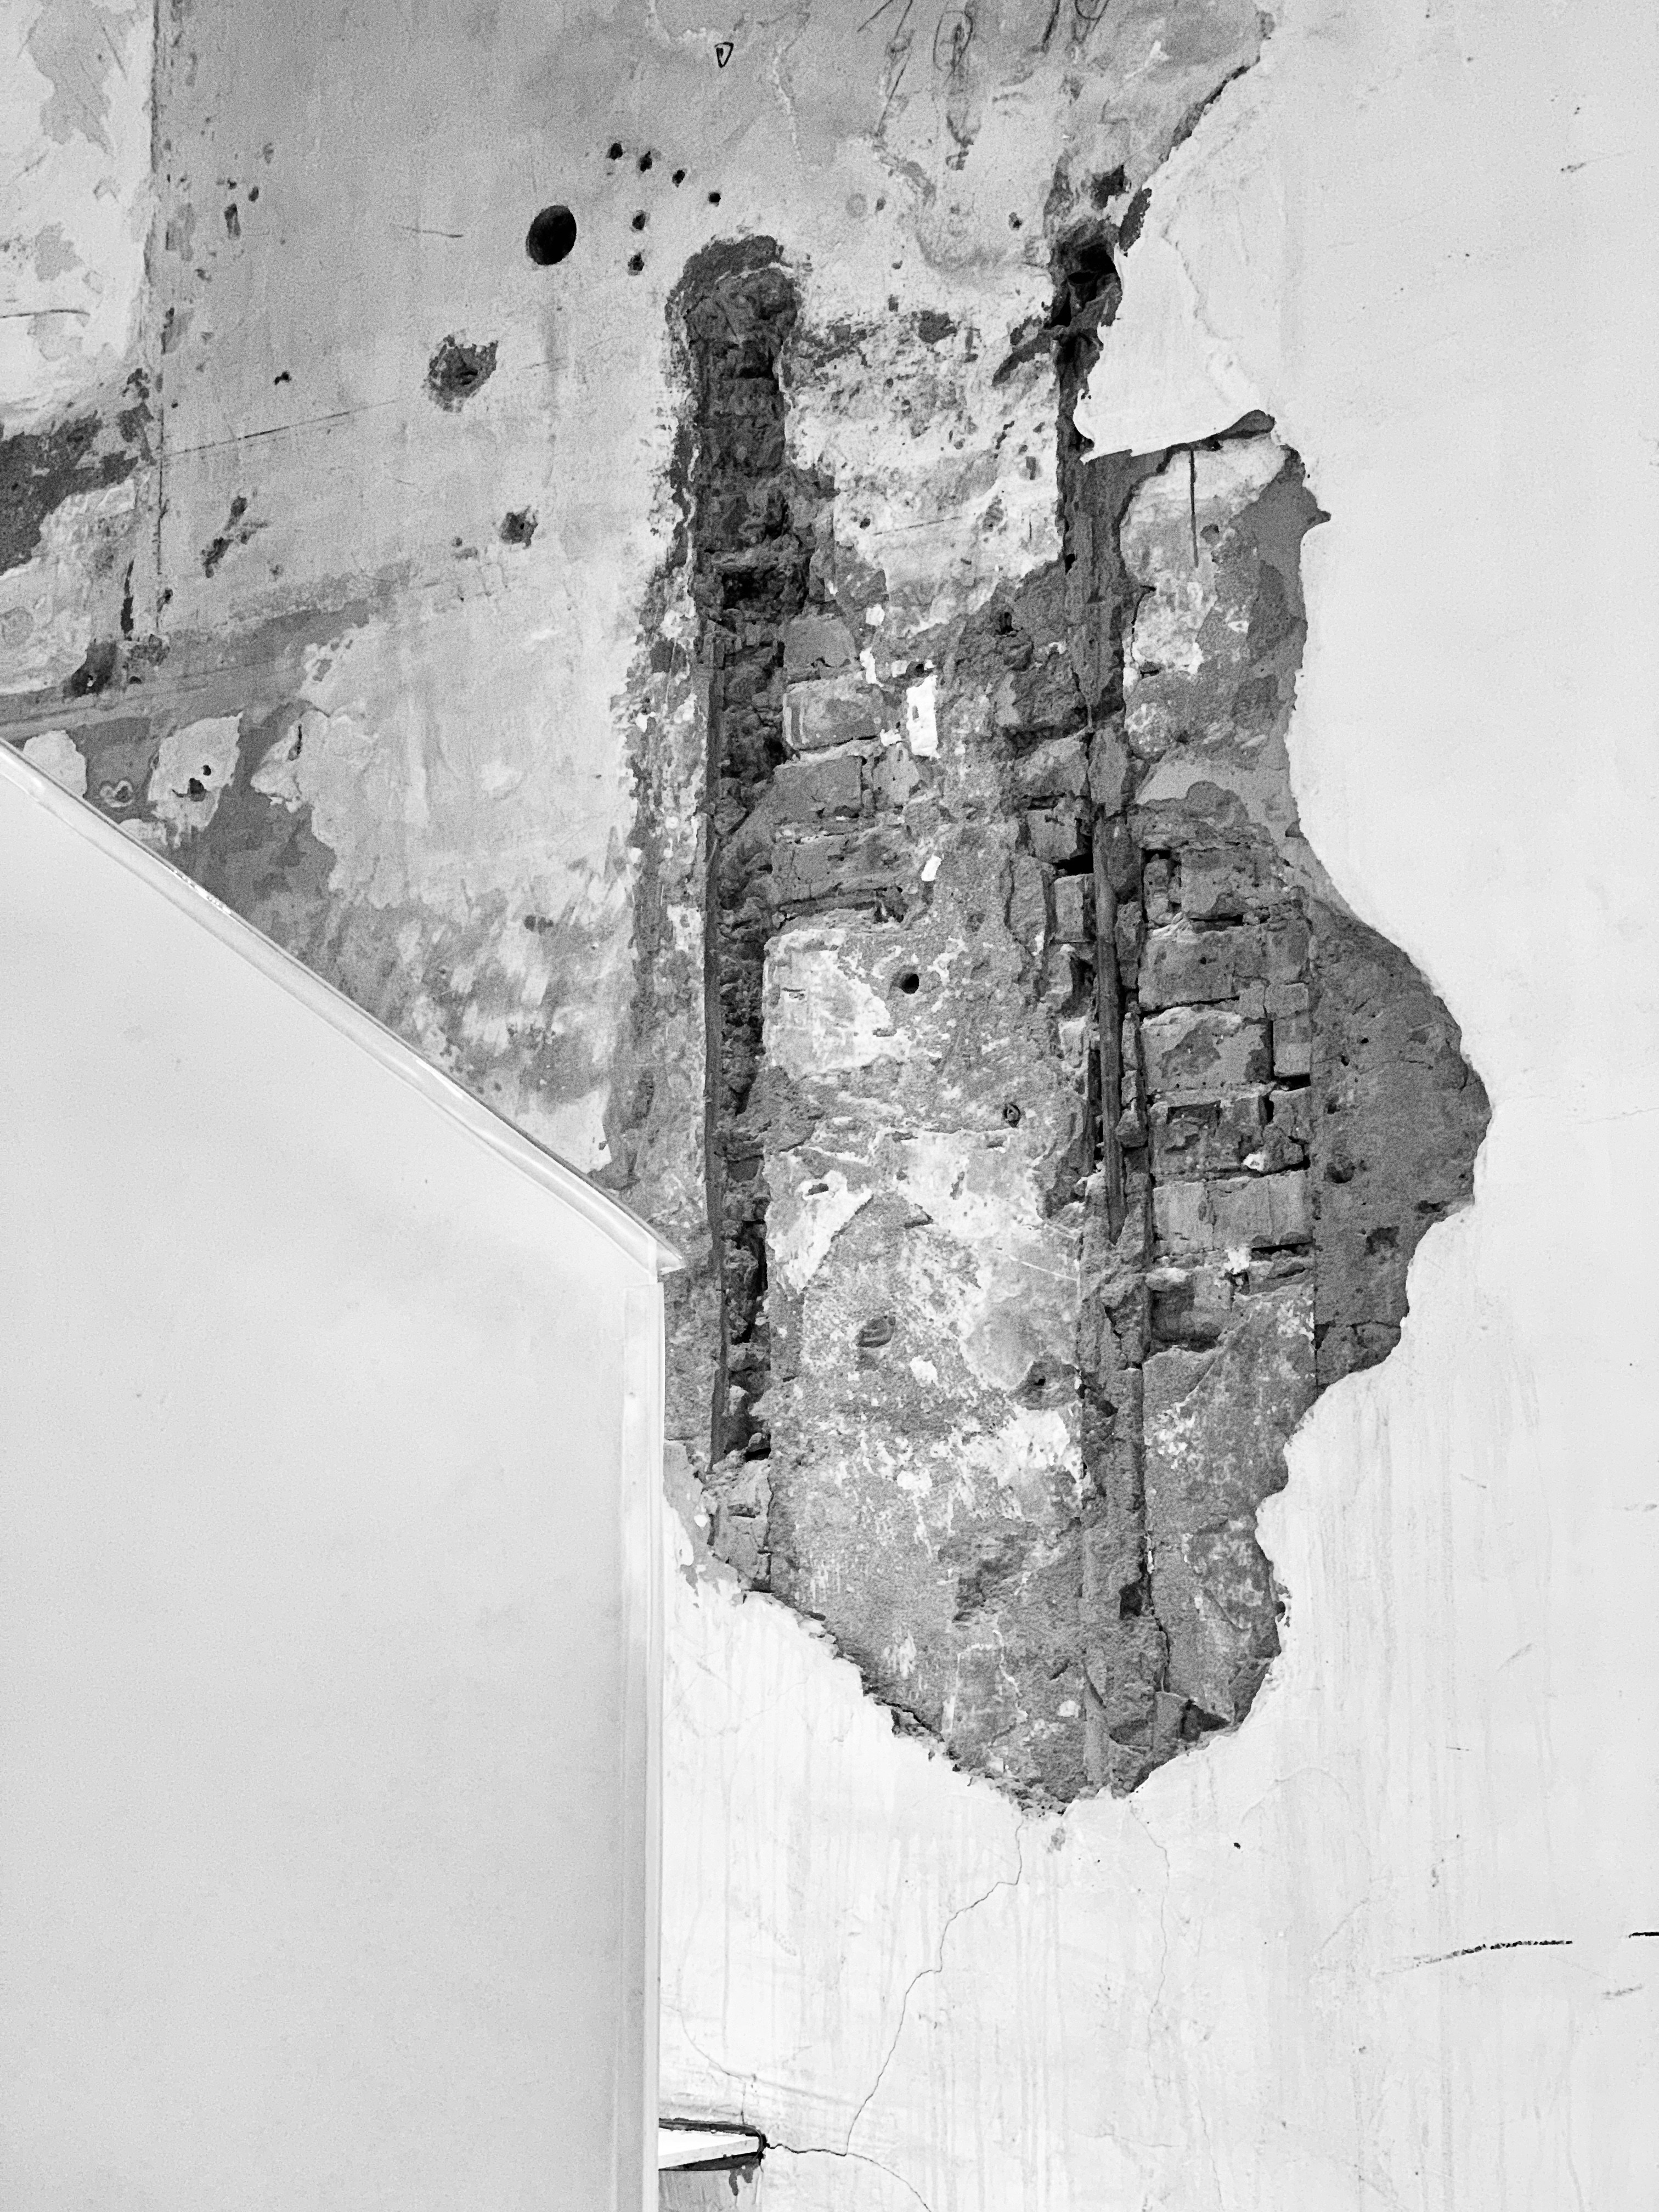
Homeowners in Indianapolis often encounter various types of drywall damage that can arise from everyday living conditions. Among the most common issues are holes, cracks, and dents that can emerge due to several factors. Understanding these damages is essential for effective drywall repair.
Holes in drywall typically occur as a result of accidental impacts, such as when furniture is moved or when a child inadvertently causes a disruption in play. Even minor nicks can develop into larger openings if not addressed promptly. Cracks often appear due to the natural settling of a house over time, or they may result from shifts in temperature and humidity. It is not uncommon for cracks to manifest around door frames or windows, indicating a possible foundational issue that needs to be assessed.
Dents, on the other hand, usually appear during ordinary interactions, such as when objects are dropped against walls. These minor damages might seem inconsequential at first but can lead to more significant issues if left unattended. Each type of damage demands attention to prevent further deterioration, which can result in moisture infiltration or pest infestation if the integrity of the drywall is compromised.
Additionally, environmental factors peculiar to the Indianapolis climate can exacerbate existing drywall issues. Fluctuations in humidity levels, especially during the warmer summer months or the cold winter, can lead to the expansion or contraction of drywall. Therefore, understanding the types and causes of damage not only aids in timely repairs but also enhances the longevity of the drywall, ensuring your home’s interior remains in excellent condition.
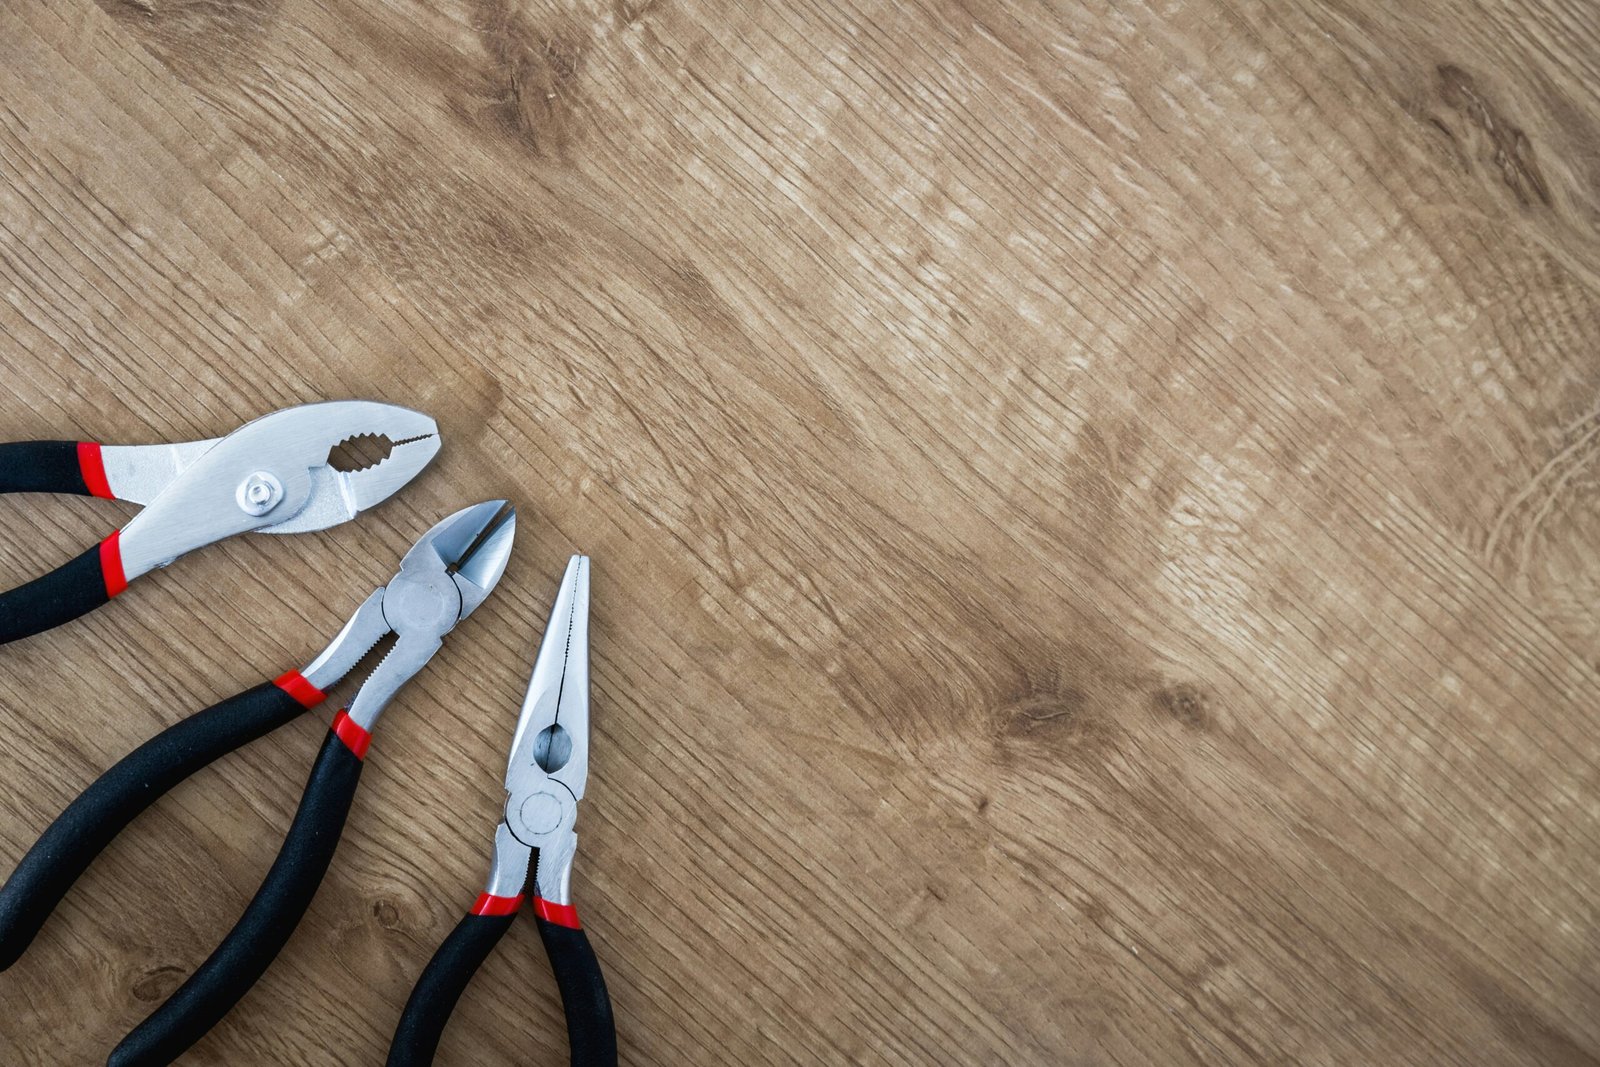
Essential Tools for Drywall Repair
When engaging in drywall repair, it is crucial to have the right tools on hand to ensure a successful outcome. The tools can be broadly categorized into manual and power tools, each serving specific purposes in the repair process.
Among the manual tools, a drywall knife is essential for the application and smoothing of joint compound. These knives come in various sizes, allowing for versatility in different repair scenarios. For smaller holes, a putty knife works well, while larger areas might necessitate a 12-inch taping knife.
The use of a sanding block or sanding sponge is indispensable for smoothing out the surface after repairs. Sanding helps blend repairs with the surrounding drywall, ensuring a seamless finish. Additionally, a tape measure is necessary for precision, particularly when measuring the area to be repaired.
For power tools, a drywall drill can expedite the installation of drywall panels, enabling quick fastening. It is advisable to use a drill that allows for adjustable torque settings to prevent damaging the drywall. An oscillating multi-tool can also be helpful for cutting out damaged areas without compromising the integrity of surrounding drywall.
Furthermore, when selecting the tools, consider the type of repair needed. For instance, simple patch jobs may only require a few manual tools, while more extensive repairs could necessitate the inclusion of power tools for efficiency.
In Indianapolis, these tools can typically be sourced from local hardware stores, home improvement centers, or rental services. By investing in the right tools, homeowners can effectively manage their drywall repair projects and achieve professional-quality results.
Materials Needed for Drywall Repair
When it comes to effectively repairing drywall, several essential materials are required to ensure a successful and smooth finish. The primary materials needed include joint compound, drywall tape, and mudding supplies, each serving a specific purpose in the repair process.
The joint compound, commonly referred to as mud, is the backbone of any drywall repair. This material comes in two main types: ready-mixed and powdered. Ready-mixed joint compound is user-friendly and ideal for minor repairs and refinishing, while powdered joint compound needs to be mixed with water, allowing for more control over its consistency.
Drywall tape plays a vital role in strengthening the joints where two pieces of drywall meet. There are two primary types of tape: paper tape and fiberglass mesh tape. Paper tape is thin and smooth, making it suitable for flat seams and providing a seamless finish. Conversely, fiberglass mesh tape is self-adhesive and offers additional strength, making it ideal for repairs on drywall corners and more extensive damages.
In addition to these core materials, various mudding supplies are necessary. A trowel or putty knife is essential for applying the joint compound smoothly while a sanding block or sponge is needed to achieve that flawless finish post-application. The total cost of these materials can vary based on location and brand preference; however, as of 2026, one can expect to pay approximately $10 to $25 for joint compound, $4 to $10 for drywall tape, and $5 to $15 for basic mudding tools.
Understanding the specific materials required for drywall repair is crucial for effective execution. Selecting the appropriate type based on the repair scenario will yield the best results, ensuring that your drywall looks as good as new.
Techniques for Invisible Repairs
When needing to address minor imperfections or damage in drywall, achieving invisible repairs is essential for maintaining an aesthetically pleasing interior. The first step in this process involves properly assessing the damage before starting repairs. For holes smaller than a quarter, a simple spackle compound may suffice, but larger issues require a more comprehensive approach.
For patching larger holes, a piece of drywall should be cut to fit snugly within the damaged area. It is crucial to ensure that the edges of the patch are feathered, allowing for a smoother blend with the existing wall. Once the patch is in place, apply a joint compound over the repair area, spreading it evenly with a drywall knife. Be sure to press it into the seams to prevent any visible outlines.
After allowing the joint compound to dry according to the manufacturer’s instructions, the next step is sanding. Use a fine-grit sandpaper to gently smooth the surface. Effective sanding is vital as it helps transition the patch to the surrounding wall, eliminating any bumps or rough areas that could catch light and reveal the repair.
Following sanding, ensure to clean off any dust before proceeding to the painting stage. Choose a paint that closely matches your existing wall color. Using a roller or brush, apply the paint over the repaired area, feathering the edges to help the new paint blend seamlessly with the rest of the wall. Multiple thin coats may be necessary to achieve an even color.
Common mistakes to avoid include over-sanding, which can create dips, and failing to feather the compound adequately. Additionally, rushing through dry times can lead to noticeable differences in texture and finish. By following these techniques and paying attention to detail, homeowners can achieve professional-looking drywall repairs without the need for hiring contractors.
If you’re interested in purchasing the item you seek, please click the link for additional details: #americanachoice.
https://amzn.to/3SBN3Oy
AFFILIATE DISCLOSURE: I am an affiliate for this company, I am not a paid employee.
I may receive a commission if you click a link on this page and choose to purchase something.
You can rest assured I will only share things I believe in and will be valuable to you.