Introduction to Tile Installation Tools
Tile installation is a skilled trade that requires not only expertise but also the right set of tools. The tools used in this process play a crucial role in determining the quality of the finished work, as well as the efficiency with which it is completed. Professional tile installation tools are purposefully designed to facilitate precision, ease, and accuracy, qualities that are essential for achieving expert-level results.
Using improper or inadequate tools can lead to various issues, including uneven tiles, compromised grout lines, and suboptimal aesthetics. These problems not only detract from the visual appeal of the installation but can also lead to additional costs in repairs or replacements over time. Therefore, investing in the right tile installation tools is not merely a matter of convenience; it is a necessity for achieving high-quality outcomes.
The distinction between amateur and professional installers often boils down to the tools they employ. Professionals utilize a range of specialized equipment, which allows them to work more efficiently and effectively. This not only enhances the speed of the installation process but also ensures a durable and long-lasting finish. Each tool serves a specific purpose, whether it is for measuring, cutting, leveling, or grouting tiles, and mastering their use is essential for anyone serious about pursuing tile installation as a craft.
In this blog post, we will explore five essential tools that elevate tile installations from mere amateur efforts to expert accomplishments. By understanding the value of these tools, both novice and experienced installers can enhance their skill set and improve the quality of their work, ultimately leading to better results and greater satisfaction for their clients or themselves.
Tool 1: Tile Cutter – Precision and Efficiency
A high-quality tile cutter is an essential tool for achieving professional results in tile installation. The type of tile cutter used can significantly impact the quality of the final product. There are two main types of tile cutters: manual and electric. Each has its advantages, depending on the specific requirements of the job at hand. Manual tile cutters are often favored for their simplicity and portability. They can be used effectively for smaller projects or when working in tight spaces, making them a cost-effective choice. With a well-calibrated manual cutter, tiles can be scored and snapped with precision, yielding clean edges and minimizing the risk of chipping.
On the other hand, electric tile cutters offer enhanced efficiency and accuracy, especially for large-scale installations. These power tools provide a continuous cutting edge, allowing the user to cut through tougher materials, such as porcelain or thick ceramics, with ease. Electric models often come equipped with water cooling systems, which help prevent overheating and cracking while ensuring smoother cuts. This feature is particularly beneficial when working with hard or dense tiles, where precision is paramount.
Using a professional-grade tile cutter, whether manual or electric, results in cleaner cuts and reduced waste. This not only helps in maintaining the aesthetic appeal of the tiled surface but also saves costs by maximizing the use of the tiles available. Furthermore, the ease of operation associated with high-quality cutters ensures that individuals, even with limited experience, can achieve results similar to those produced by seasoned professionals. Therefore, investing in a quality tile cutter is crucial for anyone looking to elevate their tile installation skills to a more expert level.
Tool 2: Laser Level – Ensuring Accurate Alignment
In the realm of professional tile installation, achieving precise alignment is paramount. A laser level stands out as an essential tool that significantly enhances the accuracy of tile placement. Unlike traditional bubble levels, which rely on gravity to provide a horizontal or vertical reference, laser levels use advanced technology to project clear, straight lines on surfaces. This feature allows tilers to easily visualize the position of tiles before they are adhered to the substrate, ensuring a smoother installation process.
The primary advantage of using a laser level is its ability to eliminate human error, a common issue when relying solely on manual tools. For example, when using a conventional level, the installer must carefully align each tile based on the bubble’s position, which can lead to skewed results if the surface is uneven. In contrast, laser levels emit a constant line across the designated area, guaranteeing that all tiles are aligned from the outset. This precision not only saves time but also minimizes the risk of errors that would necessitate costly corrections later on.
Moreover, laser levels often come with features such as self-leveling capabilities that allow for quick adjustments on uneven surfaces. This means that even in challenging environments—like sloped or irregularly shaped areas—installers can achieve a professional finish without the headaches associated with traditional leveling methods. Additionally, some models include vertical and horizontal projections, affording versatility for various installation types, whether for floors, walls, or ceilings.
Ultimately, incorporating a laser level into your toolkit can elevate your tile installation projects, yielding results that reflect a higher standard of professionalism. By ensuring accurate alignment throughout the installation process, a laser level facilitates not only expedience but also a polished finish that distinguishes expert work from amateur attempts.
Tool 3: Trowel – The Right Size and Type Matters
When it comes to professional tile installation, the choice of trowel can significantly influence the outcome. Trowels come in various sizes, shapes, and notch designs, each serving a specific purpose in the application of thinset or adhesive. Understanding these differences is crucial for achieving a well-adhered tile surface that meets both aesthetic and functional standards.
The size of the trowel should be matched to the type and size of the tiles being installed. For example, larger tiles typically require a larger trowel, often with a notched edge that helps to create a uniform layer of adhesive. The notches in the trowel’s edge help in distributing excess adhesive while ensuring sufficient coverage for the tile’s backside. For smaller tiles, a smaller trowel with finer notches may be more appropriate to prevent over-application of adhesive, which could lead to an uneven surface.
Additionally, the shape of the trowel can affect the installation process. Square notches are often recommended for larger tiles since they create a thicker bed of adhesive, enhancing bond strength. Conversely, rounded notches might be better for smaller tiles or in tighter spaces where precision is essential. Understanding the specific notching pattern—whether it be square, round, or triangle—can also help in determining the proper adhesive coverage, ensuring that all tiles are firmly set and mitigates the risk of future cracking or loosening.
In summary, the right trowel selection is crucial for any tile installation project. By carefully considering the tile size, adhesive type, and the notching pattern of the trowel, a professional finish can be achieved, ensuring both aesthetic appeal and structural integrity. Investing in quality trowels tailored to the specific needs of the project will separate amateur results from expert ones, making it an essential tool for any serious tile installer.
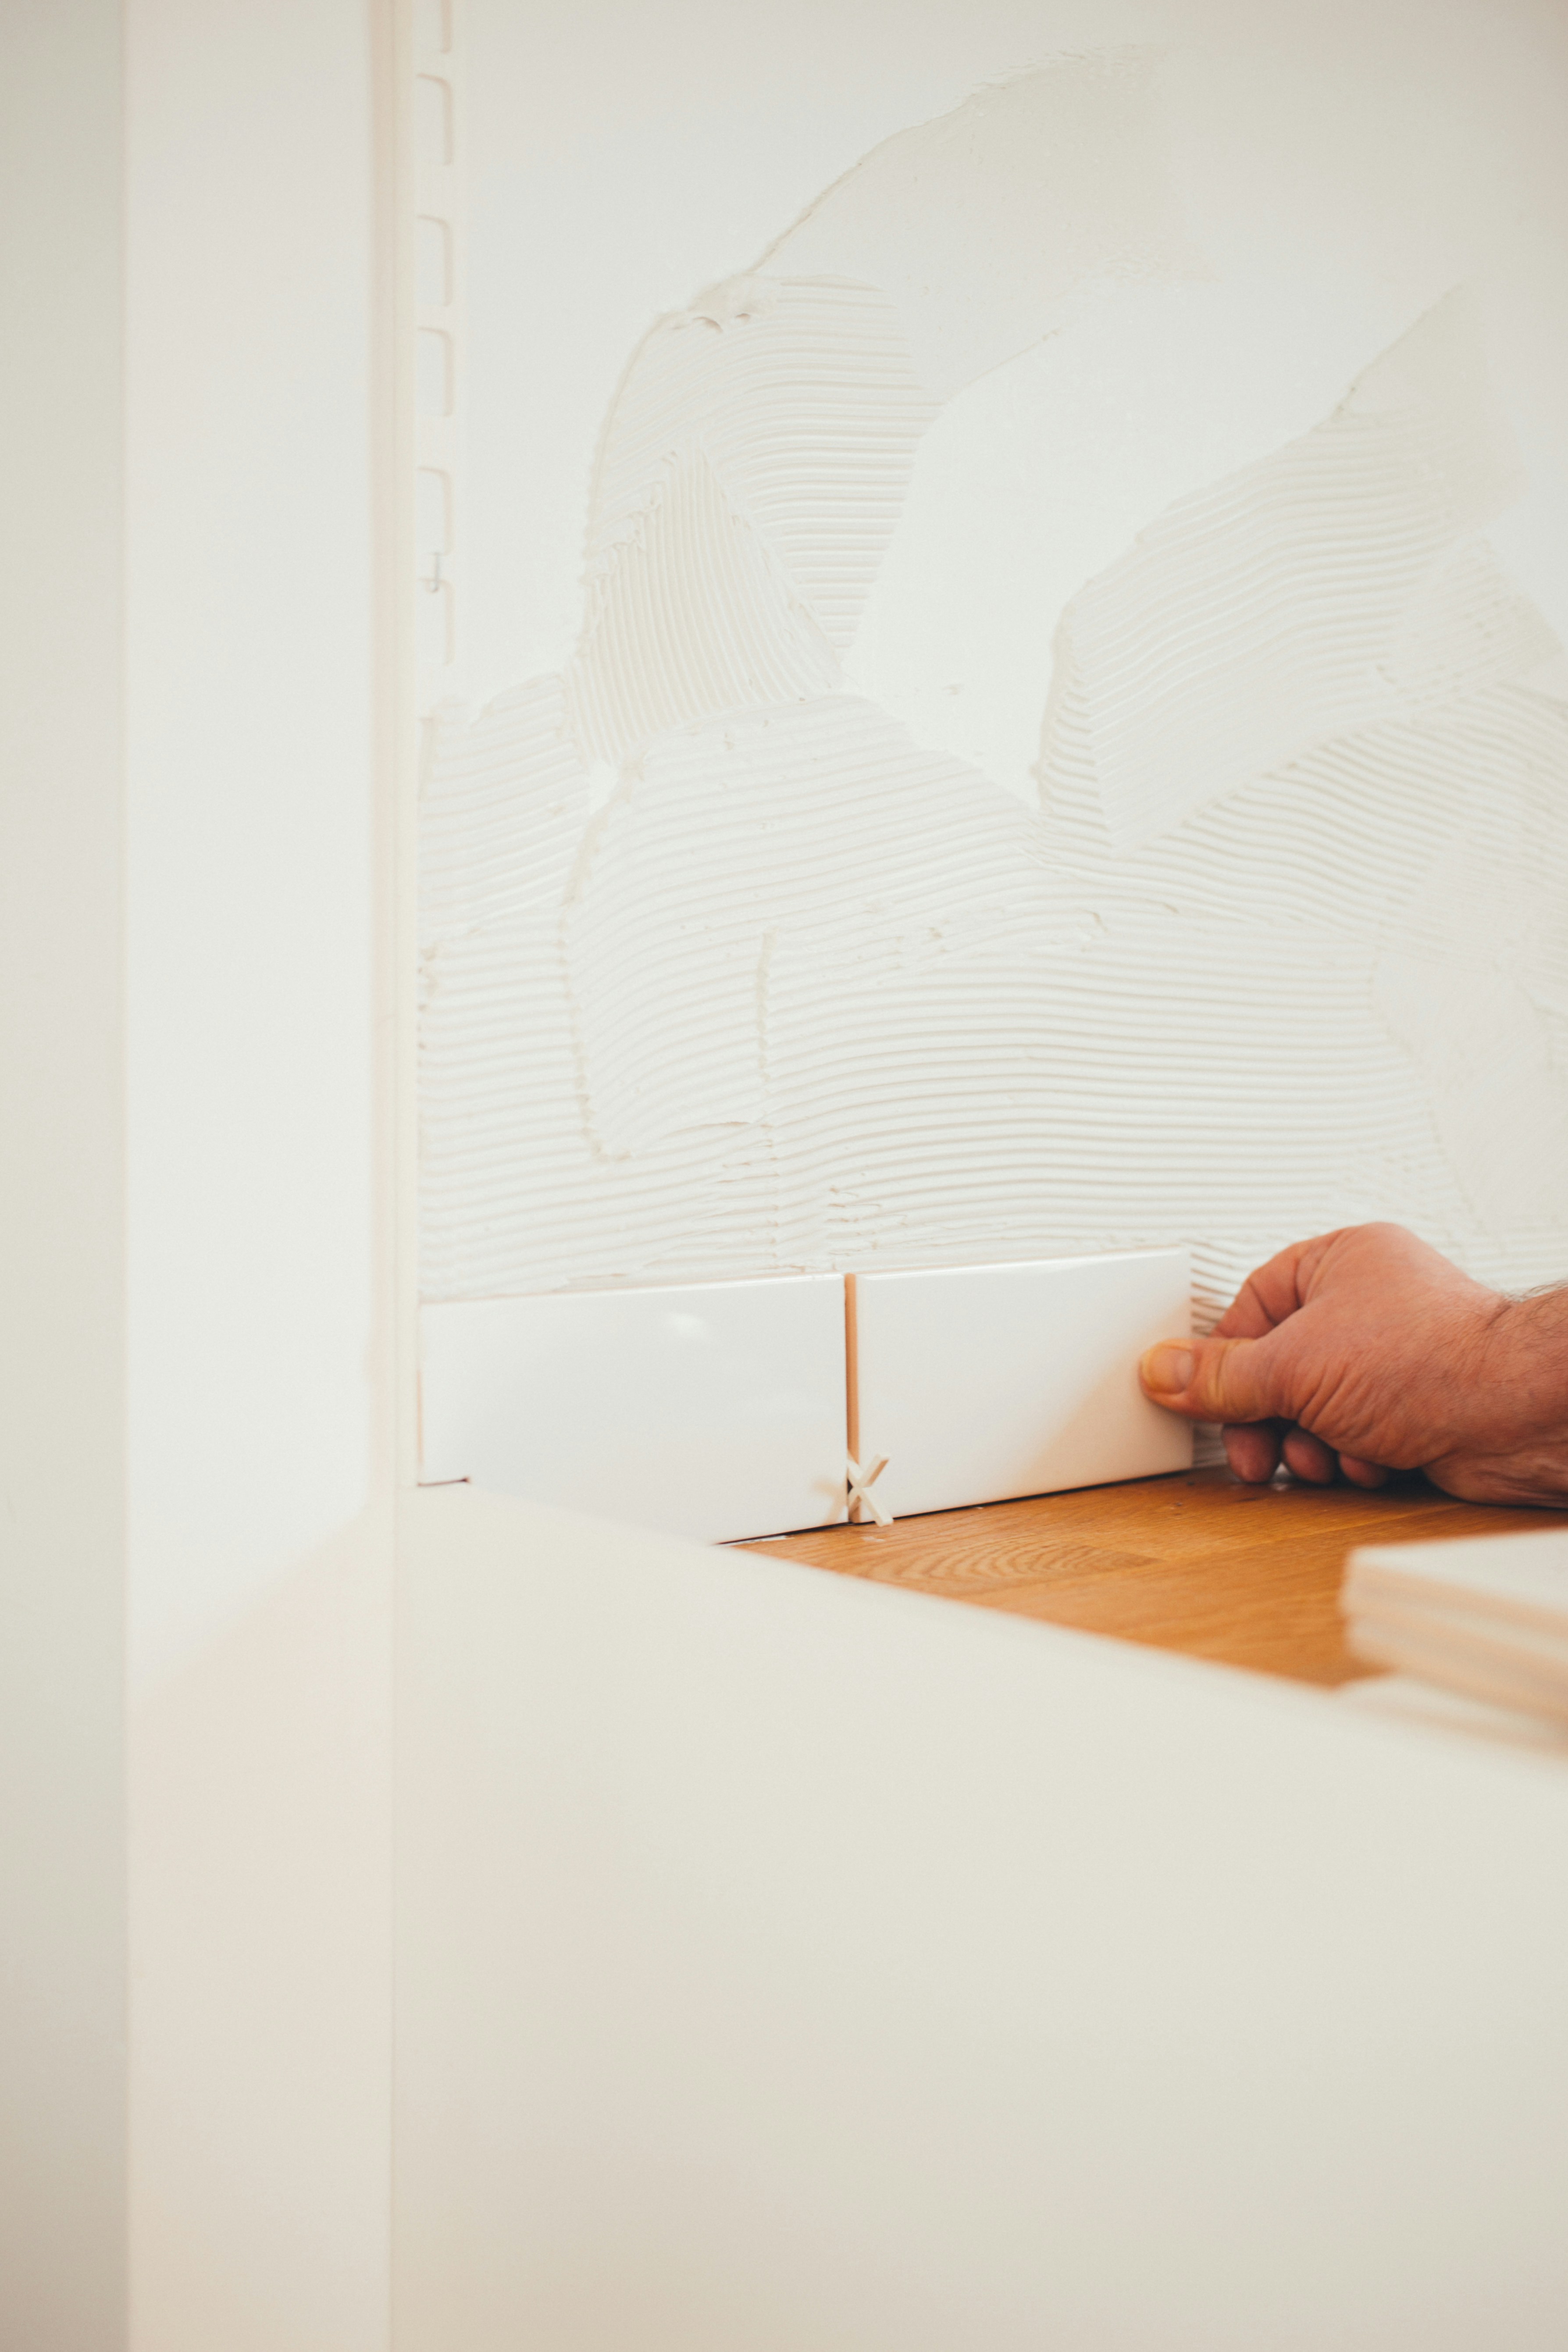
Grout Float – Perfecting the Grouting Process
The grout float is an indispensable tool in the tile installation process, which plays a crucial role in ensuring that grout is applied evenly and efficiently. Unlike standard floats, a professional grout float features a rubberized surface that allows for a controlled and precise application of grout into the joints between tiles. This design is essential for achieving a professional finish, as it helps to eliminate common issues such as uneven grout lines and excess material.
When using a grout float, the user applies pressure to spread the grout across the tile surface, forcing the material into the joints. The angle at which the float is held, as well as the amount of pressure applied, can greatly affect the outcome. For instance, holding the float at a 45-degree angle allows for better penetration into the joints, while a shallower angle may result in less effective filling. Mastery of this technique distinguishes an amateur installation from a professional one.
Choosing the right type of grout float is also vital for optimal results. Different floats are designed to accommodate varying tile sizes and grout types. For larger tiles, a wider float may be beneficial for covering more surface area quickly. Conversely, smaller floats might be preferable for intricate tile work or smaller joints. Additionally, float materials differ; some are more suited for epoxy grouts, while others work better with cement-based options. Understanding the compatibility between the float and the grout type can significantly enhance the overall quality of the installation.
In summary, the grout float is a key tool in the tile installation arsenal, instrumental in achieving a polished, uniform grout finish. Its proper use and selection tailored to specific tile and grout combinations can elevate the quality of the finished project, showcasing the difference between amateur and expert craftsmanship.
Tool 5: Tile Spacers – Achieving Uniform Gaps
Tile spacers play an essential role in the installation process, particularly for anyone looking to achieve a professional finish. These small, often plastic pieces are placed between tiles to maintain consistent gaps, ensuring that grout lines are uniform throughout the tiled area. The use of tile spacers is arguably one of the easiest yet most effective ways to elevate the quality of a tile installation from amateur to expert.
There are various types of tile spacers available on the market, including traditional cross-shaped spacers, T-shaped variants, and wedge spacers. Each type caters to different tile sizes and installation requirements. For example, cross-shaped spacers are typically used for square and rectangular tiles, allowing for equal gaps in both directions. T-shaped spacers are particularly advantageous for larger tiles, providing stability and preventing tipping during the installation. Wedge spacers, on the other hand, are useful for adjusting the spacing while maintaining tight alignment, which is especially beneficial when working with irregular surfaces.
Effectively using tile spacers involves several key practices. First, it’s crucial to determine the size of the grout line based on personal preference and the tile dimensions; this can range from 1/16 inch to 1/2 inch. After setting your tiles, insert the spacers before the adhesive dries to ensure the gaps remain consistent. As you continue laying tiles, periodically check the level and alignment to maintain an even surface. Once the adhesive has cured, you can remove the spacers, leaving behind perfectly uniform gaps that will enhance the overall appearance after grouting.
Incorporating tile spacers into your installation process not only simplifies the work but also significantly contributes to achieving a polished, professional look, reinforcing the belief that attention to detail separates expert tile installations from amateur ones.
Conclusion
Investing in professional tools for tile installation is essential for achieving high-quality results that often distinguish amateur efforts from expert ones. The right tools not only enhance the efficiency and accuracy of the installation process, but they also significantly improve the final appearance of the tiled surfaces. High-quality tools, such as tile saws, trowels, and leveling systems, are designed to provide precise cuts, even adhesive application, and a seamless finish, contributing to a more polished look.
Using professional-grade tools can also reduce the likelihood of costly mistakes during installation, which may arise from using inferior equipment. For example, a good tile saw with a sharp blade ensures clean cuts and minimizes waste materials, while a reliable leveling system guarantees that tiles are aligned properly. These factors are crucial in ensuring that the tile installation not only looks great but also lasts for many years without signs of wear or damage.
Furthermore, investing in professional tools can enhance a tiler’s skill set, leading to increased confidence in performing complex designs and patterns. The investment in quality equipment can ultimately translate into professional-grade outcomes, which can be particularly beneficial for those looking to start or grow a business in tile installation.
In light of these points, it is clear that the benefits of professional tools extend beyond just the immediate results. For anyone serious about improving their tile installation skills and elevating their work from amateur to expert level, investing in quality tools is, without a doubt, a wise decision. By choosing the right equipment, you are not only ensuring a better finished product but also cultivating a professional standard in your craftsmanship.
If you’re interested in purchasing the item you seek, please click the link for additional details: #americanachoice.
https://amzn.to/3SBN3Oy
AFFILIATE DISCLOSURE: I am an affiliate for this company, I am not a paid employee.
I may receive a commission if you click a link on this page and choose to purchase something.
You can rest assured I will only share things I believe in and will be valuable to you.